Share
Pin
Tweet
Send
Share
Send
Will need
In addition to the mentioned PVC pipe, we will need the following materials:
- plastic plug;
- neck with a handle and a lid from a plastic container;
- tin cover for cans;
- a bolt and three nuts;
- spray paint can;
- a piece of plywood 10 × 15 cm.
Of the tools you need to stock up: glue gun; gas burner; thermal and construction knife; ruler and marker; drill with drills; the miter box; hacksaw and sandpaper.
The procedure for making lifehacks of their PVC pipes
There are necessary materials and tools. We turn our ideas into useful and beautiful objects.
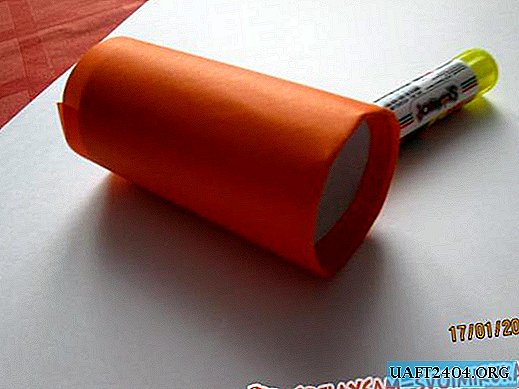
Skewer tube
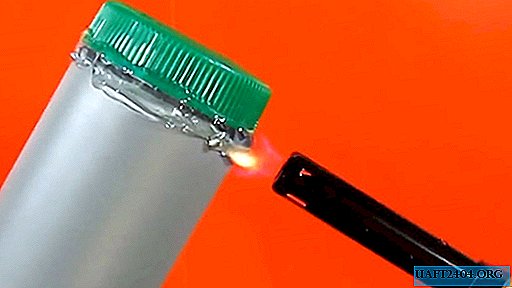
At one end of the PVC pipe, a little more skewers are stored along the length, we put a plastic cover on the glue. After installing the lid on the outside, we also apply glue and heat the joint with the flame of a gas burner.
We cut off the neck from the plastic container with the knife and save the handle.

At the other end of the pipe with an amplification ring, we apply glue and install a neck there.

For reliability, we joint the outside with glue and heat it with the flame of a gas burner.
After laying the skewers in a tube, we twist the lid. We put a handle through the bottom of the pipe, for which it is convenient to carry it or hang it on a nail.


Screwdriver storage rack
We take a PVC pipe with a bell 25 cm long and 4 cm in diameter. On the opposite sides of the side surface of the pipe with offset, we mark up for drilling through holes with a pitch of 2.5 cm.

We make holes in three steps: first, with a small diameter drill, then with a middle one, and finish with a large one. After each stage of drilling, remove chips from the holes with a construction knife.

In the center of the tin cover, we drill a hole into which we insert a bolt from below, and fix it with a nut from above.

We cover the bolt rod and nut layer by layer with glue until we get a return cone comparable to the diameter of the pipe.

We also apply glue to the pipe bell, and push it onto the glue cone all the way into the tin lid, holding it motionless for a while.

Glue a couple of nuts from the bottom of the cover to increase stability to the base of the rack.
We heat the bell outside the flame of a gas burner until the glue inside is evenly distributed throughout the entire adjacent volume, and the bell is not distributed and does not increase the contact area with the lid.

We paint the entire structure from the outside with a plain paint from an aerosol spray can.

We insert the screwdriver rods into the holes at an angle, which looks quite aesthetically pleasing and convenient compared to storage in glasses.

Stationery Stand
Using the miter box, cut off a piece of plastic pipe with a diameter of 4 cm, from which we get two equal blanks with one end face at 45 degrees. The length of the workpieces is 11 cm along the central axis. From a pipe of smaller diameter we cut a piece 10 cm long with even ends.

We cut a rectangular base of 10 × 15 cm from plywood and process along the perimeter with sandpaper.
We apply glue to the oblique section of the pipes and press them in the corners of the base close to the long side and indented from the short side by 5 mm so that they "look" straight ahead.

Glue a piece of pipe of smaller diameter between the inclined ones with a slightly larger indent from the edge of the long side of the base.
Lightly flush the upper edges of the pipes with the flame of a gas burner to remove the burrs and finish with sandpaper.
We color the stand in black and load it with stationery.

Share
Pin
Tweet
Send
Share
Send