Share
Pin
Tweet
Send
Share
Send
In order for the concrete floor screed to be performed flawlessly, you need to approach this issue seriously.
First of all, you need to prepare everything necessary for the concrete floor screed to be completed without delay. Useful for this:
- concrete mixer;
- sand;
- cement (best of grade 500);
- if there are interruptions in the supply of water - make a plentiful supply of water;
- hydrobarrier;
- working tool (shovels, buckets, trowel, rule, etc.).
If everyone has prepared, we begin work. First, prepare a quality foundation for the future screed. To do this, remove all construction and household waste from the room. Then, over the entire floor area, under the future screed, lay out the hydro-vapor barrier.
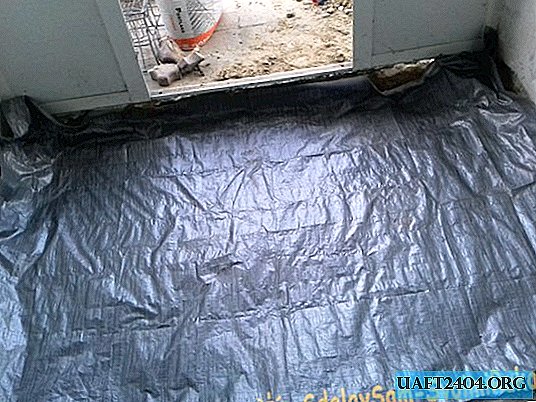
Its edges should protrude onto the walls. After that, put the beacons on the floor. This can be special beacons made of metal (sold in construction stores), as well as bricks laid in level with cement mortar (if the thickness of the screed overlaps the height of the brick). When this work is done, the beacons must be left for a day to fix them on a cement mortar.

The day after the installation of the beacons, the floor is poured with concrete. In order for the concrete floor screed to be performed perfectly, it is first necessary to prepare a high-quality mortar from a sand-cement mixture.

For quick preparation of such a solution, put sand and cement (preferably grade 500) in a ratio of 3/1 in a concrete mixer. Turn on the concrete mixer and gradually add water to the cement-sand mixture until this mixture resembles wet clay in its consistency. Mix the mortar well in the concrete mixer so that all the cement and sand lumps are mixed and turned into a single mass. Then fill the space between the walls and the lighthouses with cement mortar. As a rule, remove excess solution by moving the rule to the side relative to the beacons. If in some place the screed subsided, it is necessary to add cement mortar and repeat all the movements with the rule again. Please note that the edges of the pressure barrier protrude onto the wall and do not remain under the solution. Thus, it is necessary to fill in the remaining screed.


It is important to perform each batch of a new batch of cement immediately after the previous one has been worked out. So that the already laid screed does not have time to dry. When the entire floor has been poured with concrete, leave it to dry. For this you need to allocate from 2 to 3 days. After the floor has completely dried, cut off all the edges of the hydro-vapor barrier protruding onto the walls. After you complete all of the above steps, the concrete floor screed will be finished.

Share
Pin
Tweet
Send
Share
Send

