Share
Pin
Tweet
Send
Share
Send
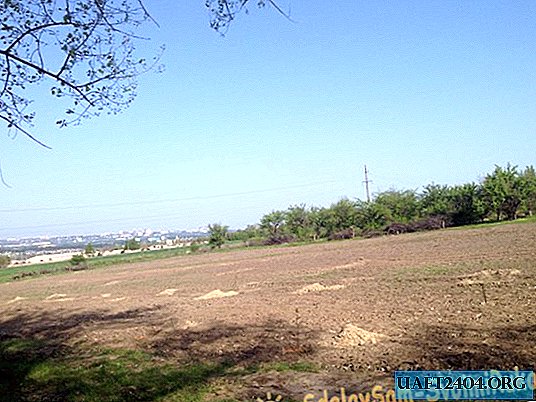
Land selection and soil preparation for planting
Preparing a seat is a key factor in creating an orchard. Choose a territory preferably flat or with a slight slope of several degrees. However, an overly steep slope should be avoided, since in this case the moisture will not hold long in the soil and will quickly go down the slope.
If there is an old garden whose trees have outlived the allotted time, it is recommended that the old trees be completely uprooted, followed by plowing and planning for young planting. To quickly organize such work, you should initially cut the trees to stumps, and then cultivate. In this case, it is advisable to use equipment (excavator or bulldozer), with the help of which the soil for new crops is then planned and leveled.
Thus, the preparation of the soil for planting includes the following items:
1) cultivation of old plantings;
2) land plowing and surface planning;
3) prevention of soil clogging by weed;
4) mulching and fertilizing the soil;
5) marking the territory for installation of the irrigation system.
To prevent the abundant growth of the weed, agrofibre should be used, which covers the entire area of the garden, or directly in rows with future seedlings. This will provide reliable protection of the soil from weed up to the time of planting of young trees. Agrofibre can be laid out immediately after plowing and leveling the soil, when weed grass has not yet begun to break through. Then, before planting seedlings, holes are made in it to ensure unhindered growth of the young plantation.

As an alternative to agrofibre, you can mulch the soil with organic matter. This will be a more economical means of protection against weed, as well as serve as additional fertilizer. For organic mulching, it is best to use straw that will retain moisture and prevent drying and cracking of the soil. It is advisable to distribute the straw throughout the territory of the future garden, but you can also spread it in rows at the sites of the proposed tree planting.

The marking of the territory and the determination of the planting sites should be made taking into account the place sufficient for the spacious growth of the seedling and crown of an adult tree. You should also consider the place for laying the irrigation system between the rows. For exact observance of equal intervals, it is recommended to pull the thread on stakes driven into the ground. At certain intervals, a hole is dug for a young seedling, the size of which on average is 30x30 centimeters, and the depth within the length of the bayonet bayonet.

Features of installing a garden irrigation system
The design of the garden irrigation system should begin with the selection of the dimensions of the water storage tank. The use of such a container is necessary in cases of absence nearby or significant removal from natural reservoirs. The volume of the water tank depends on various factors and is determined by the size of the future garden, the number of trees and the frequency of watering. As a rule, for ten acres of garden area, ten cubic meters of capacity is enough, in the role of which a metal tank can act.

To install the irrigation system you will need:
- - plastic hose 30 mm in diameter;
- - emitter tape drip irrigation;
- - fine and coarse filters;
- - mini taps for drip irrigation;
- - A set of fittings, droppers and seals.
A water tank is installed at the highest point of the territory on a solid foundation, which can be played by concrete blocks. A watering plastic hose is attached to the tap located at the base of the water tank. The most common diameter is 30 mm, which is optimal for organizing drip irrigation.

It is also necessary to install two treatment filters that will purify water from the tank and prevent clogging of emitters with small debris. In the course of the water from the tank, a coarse filter is first installed, followed by a fine filter.

The watering hose from the water tank extends perpendicular to the rows of seedlings along the entire garden. At certain intervals equal to the spacing of the row spacings, mini taps for drip irrigation cut into the hose, to which emitter tapes will then be connected. For each row of trees or shrubs, there must be at least one branch for irrigation.

Drip irrigation tapes have built-in emitters with a certain step, for example, 25 centimeters, which is ideal for watering shrubs, raspberries, strawberries, melons and other things. Tapes are connected to mini taps embedded in a common hose and extend along the landing rows.

For watering fruit trees, unlike shrubs, it is better to use a plastic hose. You can make a hole in it and insert the dropper in a specific place (next to the seedling), which will provide an economical flow of water.

The edge of the emitter tape is tied to a knot to hold water in the system, and the plastic hose from the end is clogged with special plugs. Thus, an efficient irrigation system is fully operational. This drip irrigation will rationally consume water and provide the garden with the necessary amount of water.

Share
Pin
Tweet
Send
Share
Send