Share
Pin
Tweet
Send
Share
Send
So, for the master class we take:
- Two pieces of cardboard marbled;
- Scrapbook paper in turquoise and lilac color;
- Lilac and turquoise satin ribbons in peas 12 mm wide;
- Pictures on the spring theme, with different inscriptions;
- Chocolate bar pattern;
- The inscriptions "Happy Holiday" and "Happy Birthday";
- Cut down petals, twigs, spikelets, openwork napkins and butterflies;
- Puncher, if there is a curb;
- Chiffon ribbons with roses purple and mint;
- Flowers paper and latex roses;
- Complex bouquets of stamens;
- Half beads;
- Ink pads for tinting;
- Double-sided tape, ruler, scissors, pencil, glue stick.

So, first of all, we need to familiarize ourselves with this scheme and transfer the dimensions to cardboard, so that we get the basics for postcards.


We measure everything, transfer dimensions and cut it out. Now, according to the scheme, we still need to draw scoring lines, then to lay down the basics of the chocolate boxes.


Add up and get these basics.


Now cut off the stripes of tapes, glue the back and front, so that then the chocolate boxes are tied.


Now go to the scrapbook paper and cut out three figures for each chocolate bar. Dimensions are indicated. Now we will decorate the two front rectangles with spring pictures, cuttings and inscriptions.


Pillows tint all the elements. We glue and sew on.


Now for each chocolate bar we glue the corresponding figure and sew each side separately.


Fold and tie on a bow.


Now just glue the scenery. We collect flowers in bouquets, glue together with leaves and twigs. Glue butterflies, half beads and done.


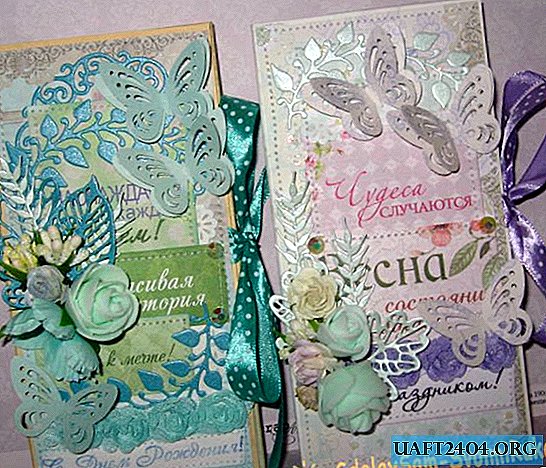
Here is the result of our collaboration. We get such delicate postcards. Thank you all and see you soon!

Share
Pin
Tweet
Send
Share
Send