Share
Pin
Tweet
Send
Share
Send
To make an album with Mini Mouse we need:
• Cardboard thick binding 21 * 30 cm, two sheets;
• Sheets printed and made in Photoshop with a Mini Mouse;
• Fabric pink floral and pink with a mouse;
• Scrapbooking paper measuring 30 * 30 cm in pink colors with white stars and polka dots;
• Two cut-out napkins white and pink;
• Pictures with the Mini mouse;
• Name card "Beloved daughter Veronika";
• Roses on the ribbon pink and white;
• Pomoshki light pink on a tape;
• Pearl semi-beads of pink color;
• Metallic pink rings;
• Light pink eyelets and installer;
• Ribbon white and pink with a strip 25 mm wide;
• Paper hydrangea white and pink;
• Small pink buttons;
• Knitted pink flowers;
• Wooden inscription "Baby" pink;
• Pillow for tinting pink;
• Curb hole punch;
• Adhesive materials: double-sided tape, glue stick, adhesive with the effect of tape from Evgenia Kurdibanovskaya;
• Pink double cotton lace;
• Scissors, pencil, ruler, lighter.
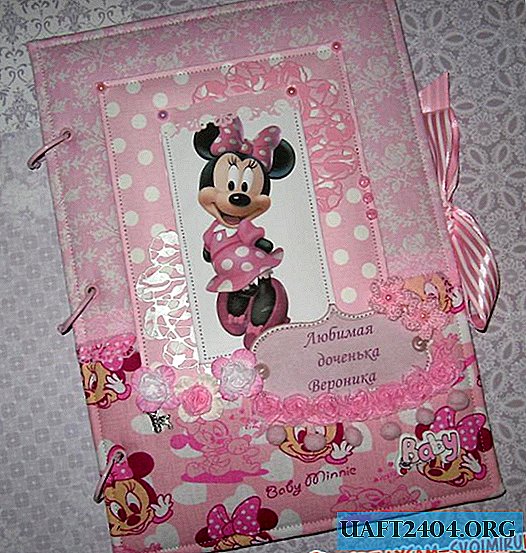

The album will be quite roomy and large, the size of it will be in landscape format. Glue cardboard binding sheets with strips of double-sided tape. Glue the synthetic winterizer on both sides of the cover.


Now we need to combine and cut the fabric. Ode side will be vertically framed, and the second horizontally, so cut the fabric, also cut two strips of lace.


Iron, sew and sew lace at the joints.


Now we glue both sides of the cover with a cloth.


In the middle of the cover, glue the strips of tape into a strip.


Now try on the design on the front cover.


A rectangle measuring 14 * 18.5 cm, we tint the edges and also tint the picture, the card. We glue the rectangle, sew it on, glue both napkins on it, glue the mouse and card on top of the picture, we also sew them.


Inside both parts of the cover you need to make the inner bookends. One glue in two parts. Bookends 20.5 * 29.2 cm.


At the back of the album we’ll make a pocket in which we will put tags from the pen and the hospital. We cut off the scrapbook rectangle of 15 * 30 cm. We retreat with both edges of 6 cm, draw two lines of bends under the ruler.


Add the blank. Cut a small rectangle inward. We also cut a rectangle of 9.5 * 20.5 cm. Both of these rectangles are punched on top.


Inside, we paste the "my tags" card, sew it and paste it into the tear-off blank. We glue our blanks on both bookends like this, we sew everything on a typewriter.


We paste prepared bookends inside the covers. We put both covers under something heavy. Now we are preparing the sheets.


Glue them in pairs in the desired sequence.


Sew all the leaves. Now in the cover we need to make three holes and insert the eyelets.


We insert three grommets on both sides of the cover.


Now we make three holes in all the sheets. Now we collect the album to the rings.


Glue some decorations on the cover and you're done. It turned out both a gentle and at the same time deeply pink children's album. Grateful for your attention and see you soon!


Share
Pin
Tweet
Send
Share
Send

