Share
Pin
Tweet
Send
Share
Send
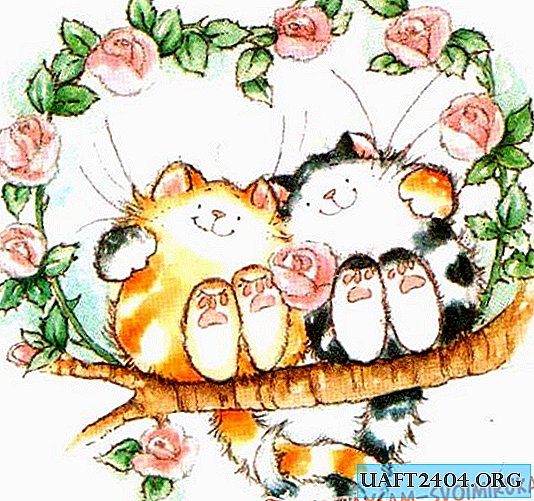
You will agree with me that you can draw beautifully even without really learning how to draw, you need to have a great desire and basic skills (school). In order to cope with the task, you need to follow these recommendations:
1. Decide what you want to draw. You can independently come up with a picture, or, as I did, find your favorite picture in a book, on the Internet.
2. Prepare the workplace, free it from foreign objects. It is important. Nothing should interfere with your creativity.
3. Select the material on which you will execute the drawing (paper, cardboard, canvas, fabric). The density and quality of the material depends on what you will draw the picture (this applies to paper): colored pencils, gouache, acrylic, watercolor. For example, a simple stationery paper is suitable only for pencils, it simply “melts” from any kind of ink. This is due to the fact that when paints are used, they are diluted with water - and the paper softens.
4. Decide what you will perform the drawing; pencils or paints.
5. Prepare brushes of different sizes for painting with paints.
Here are the main points that you need to decide before starting work.
Now let's move on to the most interesting ...
STEP 1.
You will need:
- paper;
- a simple pencil;
- eraser;
- pre-selected picture.
First of all, visually determine the middle of the sheet, so that later the drawing is not shifted to one or the other side, but is exactly in the middle. In my case, the ears of the cats should be in the middle of the sheet, which means that the kittens themselves are on either side of the center. First of all, I decided that I would start painting from a cat (the one to the left) is just my personal desire, you can even start painting from a branch on which cats are sitting or from a heart that represents love. I started to draw from the head and ears, and then proceeded to the image of the eyes and the bat (nose). As you can see, I slightly altered the eyes, it seemed to me that this would be more beautiful and expressive, but you can leave the eyes in the form of “dots”, as in the main picture. The next step, I added shape to my kitty, figured out how her body should be so that it was not too thick or thin (head 1/3 and body 2/3). Dorisova paws with pads (as you can see the left paw is slightly smaller than the right) and the tail of my beauty. After that, I made an initial sketch of the cat’s head, “planted” my lovers (so far one) on a branch and painted a heart around them. Here's what happened to me:


STEP 2.
Now go to the cat. His head should be in contact with the head of the cat in the area of the ears. I drew the cat in the same sequence: the cat’s head, facial features (eyes, muzzle), body (I got it slightly larger), paws with pads. Nothing complicated. In the middle between my lovers I placed a flower (an elegant rose should have turned out). And do not forget to draw the legs, they are hugging, as befits a lover.

Now draw the intertwining ponytails.

STEP 5.
The next stage of our creativity will be work on our heart. In STEP 1, I drew a sketch of the heart around the seals, now you need to add the elements: roses and leaflets. This should be done so that the contours of the heart are not visible. Our heart is nothing more than a twig with roses, braided around a “couple in love” and personifying tender feelings. It was easier for me to start painting the heart with roses on top of the cats, where the concave corner of the heart is. Not always the roses turned out to look like a real flower, but I was not upset, because a lot also depends on how you color. You can draw leaflets and roses not according to a stencil (drawing from the Internet), but how your imagination will tell you what I did.

Here's what my drawing looks like in raw (not colored) form:

STEP 6.
We proceed to the most difficult part of our "art". Let's decide on the coloring of our "halves". I figured that it’s worth moving away from the real image and introducing my idea. Such an idea was a change in the color of the cats: my girl came out with a blonde coquette, and her gentleman turned out to be a burning macho with a romantic heart on her abdomen (but this later). The first thing I did was to draw out the eyes and the pretty face of my coquette. Naturally, I got a blonde with blue eyes, whose eyes are aimed at my beloved cat. In my work on cats I used both watercolor and gouache. Gouache is a thicker paint, so you can perfectly make outlines with it or highlight important elements of the image. For the color of the cat, I used yellow, orange and white. I mixed them on the palette. First, I applied a light (yellow + white) base to the whole body. Then I added a little orange to the palette and added stripes, as in the picture. Pillows painted pink, as expected. For a more expressive look I used brown gouache.


STEP 7.
Our cat is ready, now let's get to the cat. I decided to make it dark so that it was immediately apparent that this was a boy.
Used the following colors:
- basis - the same as for a cat (yellow + white). Used watercolor;
- orange + brown + white gouache;
- brown gouache;
- heart on the abdomen (light brown and brown gouache);
- ears and pads on the legs - pink watercolor.

STEP 8.
We turn to the roses. It was possible to choose a red color for them, but it seemed to me that pink roses would look more delicate (some kind of direct tautology turned out). We apply strokes so that the sketch does not hurt, it's okay if there are bright spaces.

Each rose along the contour should be outlined with pink gouache, highlighting the petals. And on the petals themselves, carelessly go through the paint, making the effect of the credibility of the flower.


STEP 9.
We gradually came to an end. Next in line were the leaves.
In this step, I used:
-base of leaves (green + white watercolor);

-the next layer is green watercolor, careless brush strokes and border of leaves;

-the next layer is green gouache for drawing the contours of leaves and careless strokes, giving a natural look;


STEP 10.
Our drawing is almost ready, it remains only to decorate the branch on which our cats in love have safely settled down.
Used:
-base - dark yellow gouache;
- careless strokes (brown + white gouache), brown gouache;
At this stage, you need to try to make a branch similar to a natural one.

STEP 11.
So our drawing is ready. Wonderful, as for me, it turned out. But I decided to add my elements here too. Since I am drawing a picture for my beloved, I decided that small hearts and inscriptions of recognition would not be superfluous.


Dear ladies and gentlemen, I present to your court my creation - "Loving cats". I ask you not to judge strictly, because a piece of the soul was put into it. I believe that such a wonderful gift will not leave indifferent even the most restrained person. After all, you worked for someone, your work will not go unnoticed.


Share
Pin
Tweet
Send
Share
Send

